
Set Your Formovie THEATER Up Like a Pro
On the journey to owning the biggest possible screen for your home entertainment area, you may face the hurdle of a TV that’s simply too big to be practical, or too bulky for the modern aesthetic of your space. A traditional long-throw projector is a feasible solution in relatively large spaces, but a laser TV like the Formovie THEATER is the perfect solution to help you take full advantage of a smaller space while maintaining premium display quality. The most important part of your setup process is finding the ideal placement for your UST projector, and deciding which wall is most suitable for screen placement.
Where Should You Place the UST Projector?
The Ultra-Short Throw projector is designed to be placed a short distance from the screen, and the standard placement for it is on the TV stand right under the screen. Alternatively, it can be mounted to the ceiling for a completely minimalistic interior design, however, that does take away your ability to set the projector up for different occasions like outdoor viewing parties for sports games. Either way, for both of these options, you’ll need to determine how far to place the projector from the screen in order to achieve the desired display size. This is known as the throw ratio.

The throw ratio is calculated using the formula Throw ratio = Throw distance/Image width. So in order to reach the maximum image width of 150 inches on the Formovie THEATER, the UST would need to be placed 49 cm away from the screen (throw distance), and 50 cm below where the screen starts (height). Below is a detailed chart to illustrate the throw distance/image width.

Does a Laser TV Need a Special Screen?
The beauty of the Formovie THEATER is that it can display incredible images on any clean surface like a white wall or sheet. According to ProjectorScreen.com, the image can be made better with the use of a light-rejecting screen, or light-rejecting paint that is specially formulated to work with a UST projector.
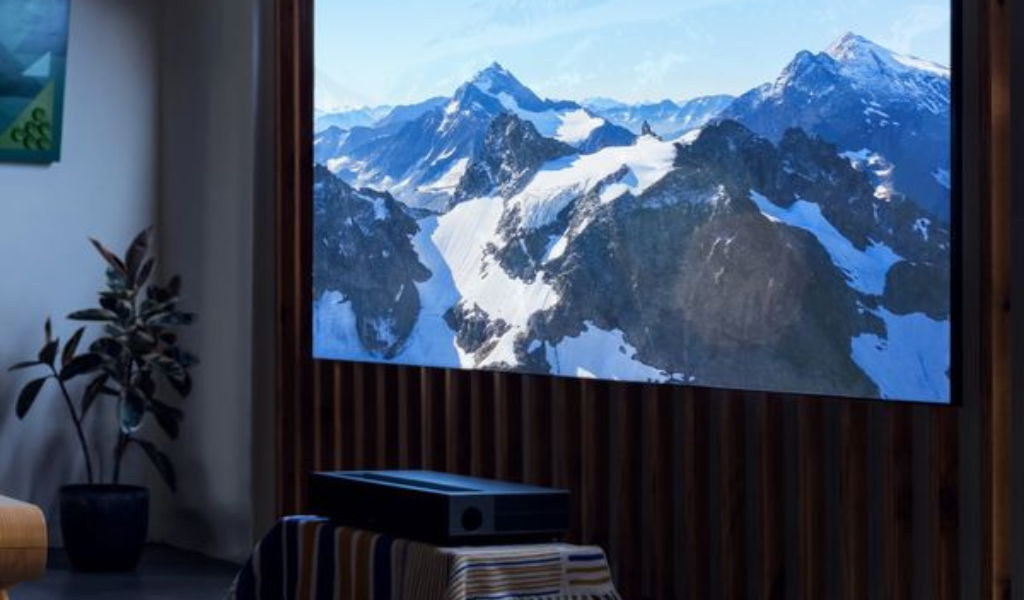
The Simplest Installation
Ensure that the surface you wish to place your projector on is sturdy enough to support it while minimizing disruptions caused by foot traffic. After the initial setup, you’ll need to reconfigure the image if the projector is jolted out of its position. You can adjust the throw ratio by either moving the projector into a different position or by physically adjusting the placement of the furniture. In this position, the projector remains mobile enough to be transported into different rooms or areas, and all cable connections can be discreetly tucked away behind the furniture.
Permanent Installation
In a room that’s dedicated to entertainment, like a home theater room, It’s more aesthetically pleasing to have an empty space in front of your screen so it can embody the look and feel of a cinema. Mounting your UST to the ceiling can give your theater even more legroom by reducing the need for additional furniture. Secure the ceiling mount onto the projector first, making sure to use a non-self-tapping 4 mm x 10 mm screw. The ceiling mount should be strong enough to carry five times the weight of the projector, and it should allow at least 10 cm of room to ensure that there is enough air flowing to the air inlets and heat dissipation vents.
After it is installed, it’ll be a permanent fixture in the home and you won’t need to worry about it being jolted out of place. However, you will need to do some extra work to hide all cable connections.

Connect Your Appliances
There are six types of connectivity ports built-in to the Formovie THEATER, giving you the option to enjoy a variety of content from multiple devices with ease. The seventh port is arguably the most important one, and that’s the power socket.

2x HDMI Ports:
Use these ports to connect a cable box, Blu-ray player, gaming console, or other devices to your projector to enjoy the highest quality audio and video.
HDMI eARC Port:
This connection allows you to get the most out of all audio output devices such as a soundbar or external sound system.
2x USB Ports:
Connect a USB flash drive or external hard drive to access photos, music, or movies.
Audio Out Port:
Use the Formovie THEATER with more than one audio output device by connecting it to the line out port.
Optical (Digital Audio Out):
Connect an optical cable to an external digital audio system
Ethernet Port:
Access your home’s internet connection with a LAN cable for easy use of the internet.
Get Ready to Entertain
Once everything is set up, make sure that all cables are hidden away to avoid unnecessary disruption and to keep the area tidy. Follow the simple instructions in this video by @Nothing But Label to initiate the 8-point auto-keystone correction, and get ready for an impressive display brought to you by Formovie THEATER.
Home Theater Inspirations

